- Verified replacement for the obsolete Hunter Dorigon II.
- DOI / Haze Meter is designed to measure flat, non-textured high reflectance surfaces.
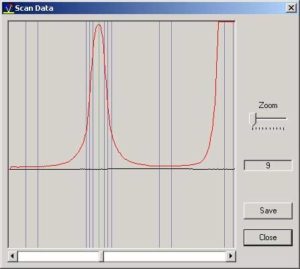
- Designed in accordance with ASTM E430 and ASTM D5767 (method A) and is used to measure 3 degrees around the specular lobe centered at 30 degrees in approximately 220 increments. Angular sample size of 1 sample per 1.6 minutes of arc.
Model 807 DOI / Haze Meter
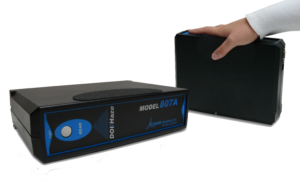
Replacement for the obsolete Dorigon II
TRICOR’s Hazer Meter and DOI is ideally suited for measuring flat, non-textured high reflectance surfaces. The Model 807A Haze Meter design is in accordance with ASTM E430 and ASTM D5767 (method A) and is used to measure ±3 degrees around the specular lobe centered at 30 degrees in approximately 220 increments. That’s an angular sample size of 1 sample per 1.6 minutes of arc! This allows differentiation between samples with very small differences in reflectance characteristics. Verified replacement for the older Hunter Dorigon II haze meter unit.
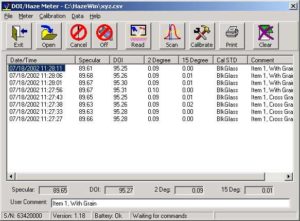
Operators need only press 1 button on the unit to obtain a measurement in less than 4 seconds. Computed results include Rs (specular gloss), DOI (Distinctness-of-image gloss) and haze (2 & 15 degrees). The device can help quantify reflectance, doi, haze, sheen, reflection directionality, reflectance haze, metallic brightness for metals, glass, ceramics, painted surfaces and any other high reflectance surface. The system was designed as a direct replacement of the obsolete Dorigon II.
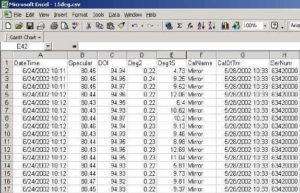
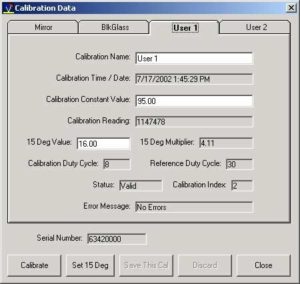
The system is operated via RS232 from any PC (w/Windows™) or Palm Personal Digital Assistant. Quickly switch from a mirror standard to a black glass standard for non-metallic measurements. Statistical sample averaging is performed. Each measurement is time and date stamped. Data can quickly be downloaded directly into a MS Excel spreadsheet.
Low power consumption and power saving features allows standard AA NiCd type batteries to be used. Battery life is in excess of 10 hours of continuous operation without need for new batteries. An optional ac adapter and battery charger is available for use with rechargeable batteries. A Non-contact optional configuration is also available.
The Model 807A Haze Meter can be configured for either contact or non contact measurements. The non contact configuration allows easy integration into a production line.
| Standards |
|
| Geometry |
|
| Measured Parameters |
|
| Measurement Area | .21 in (5.3 mm) Diameter |
| Angular Measurement Limits |
|
| Light Source | White LED |
| Measurement Time | < 4 seconds |
| Batteries |
|
| Dimensions (H x W x D) | 9 x 7 x 2.4 (in) 22.9 x 17.8 x 6.1 (cm) |
| Weight | 4.1 lbs. (1.86 kg) |
| Operating Temperature |
|
| Relative Humidity | < 85% @ 95°F (35°C) |
| Dorigon II Replacement |
Some Typical Applications
- Dorigon II Haze Meter Replacement
- Metal
- Painted products
- High polished/glossy surfaces
- Tiles
- Pottery
- Chrome Finishes
- Countertops
- Flooring
- Glossy Paper
- Can be customized to measure your product’s appearance characteristics
System Component
- Measurement Device
- DOI/Haze Meter Application Software
- 10 ft (3 m) Interface Cable
- Calibration Mirror (Optional)
- Calibration Black Glass (Optional)
- AC Recharger / Adapter (Optional)
- PDA w/Interface Software (Optional)
- Carrying Case (Optional)
Versatility
- Contact Operation
- Non-Contact Operation
- In-line measurement
Customer Requirements
- Personal Computer: Pentium III @ 400 MHz running Windows® 9X, NT, 2000, XP with RS-232 Interface.
Distinctness Of Image (DOI) Gloss
Terminlogy
DOI – aspect of gloss characterized by the sharpness of images of objects produced by reflection at a surface. (ASTM E 284)
 In general, as DOI decreases, reflections at the sample surface appear to spread or fuss. This can readily be seen along the reflection’s perimeter. The Surface Analysis System’s DOI algorithm measures this spreading phenomena.

An area is determined from each of the image reflections. A circle is created that has the same area for each of the two images and is drawn above/right. The difference between the Reference radius and the Sample radius represents the DOI loss.


